Pymesh Provisioning
In the flow below, a single device is being used to illustrate the provisioning, but the user can use as many devices is necessary.
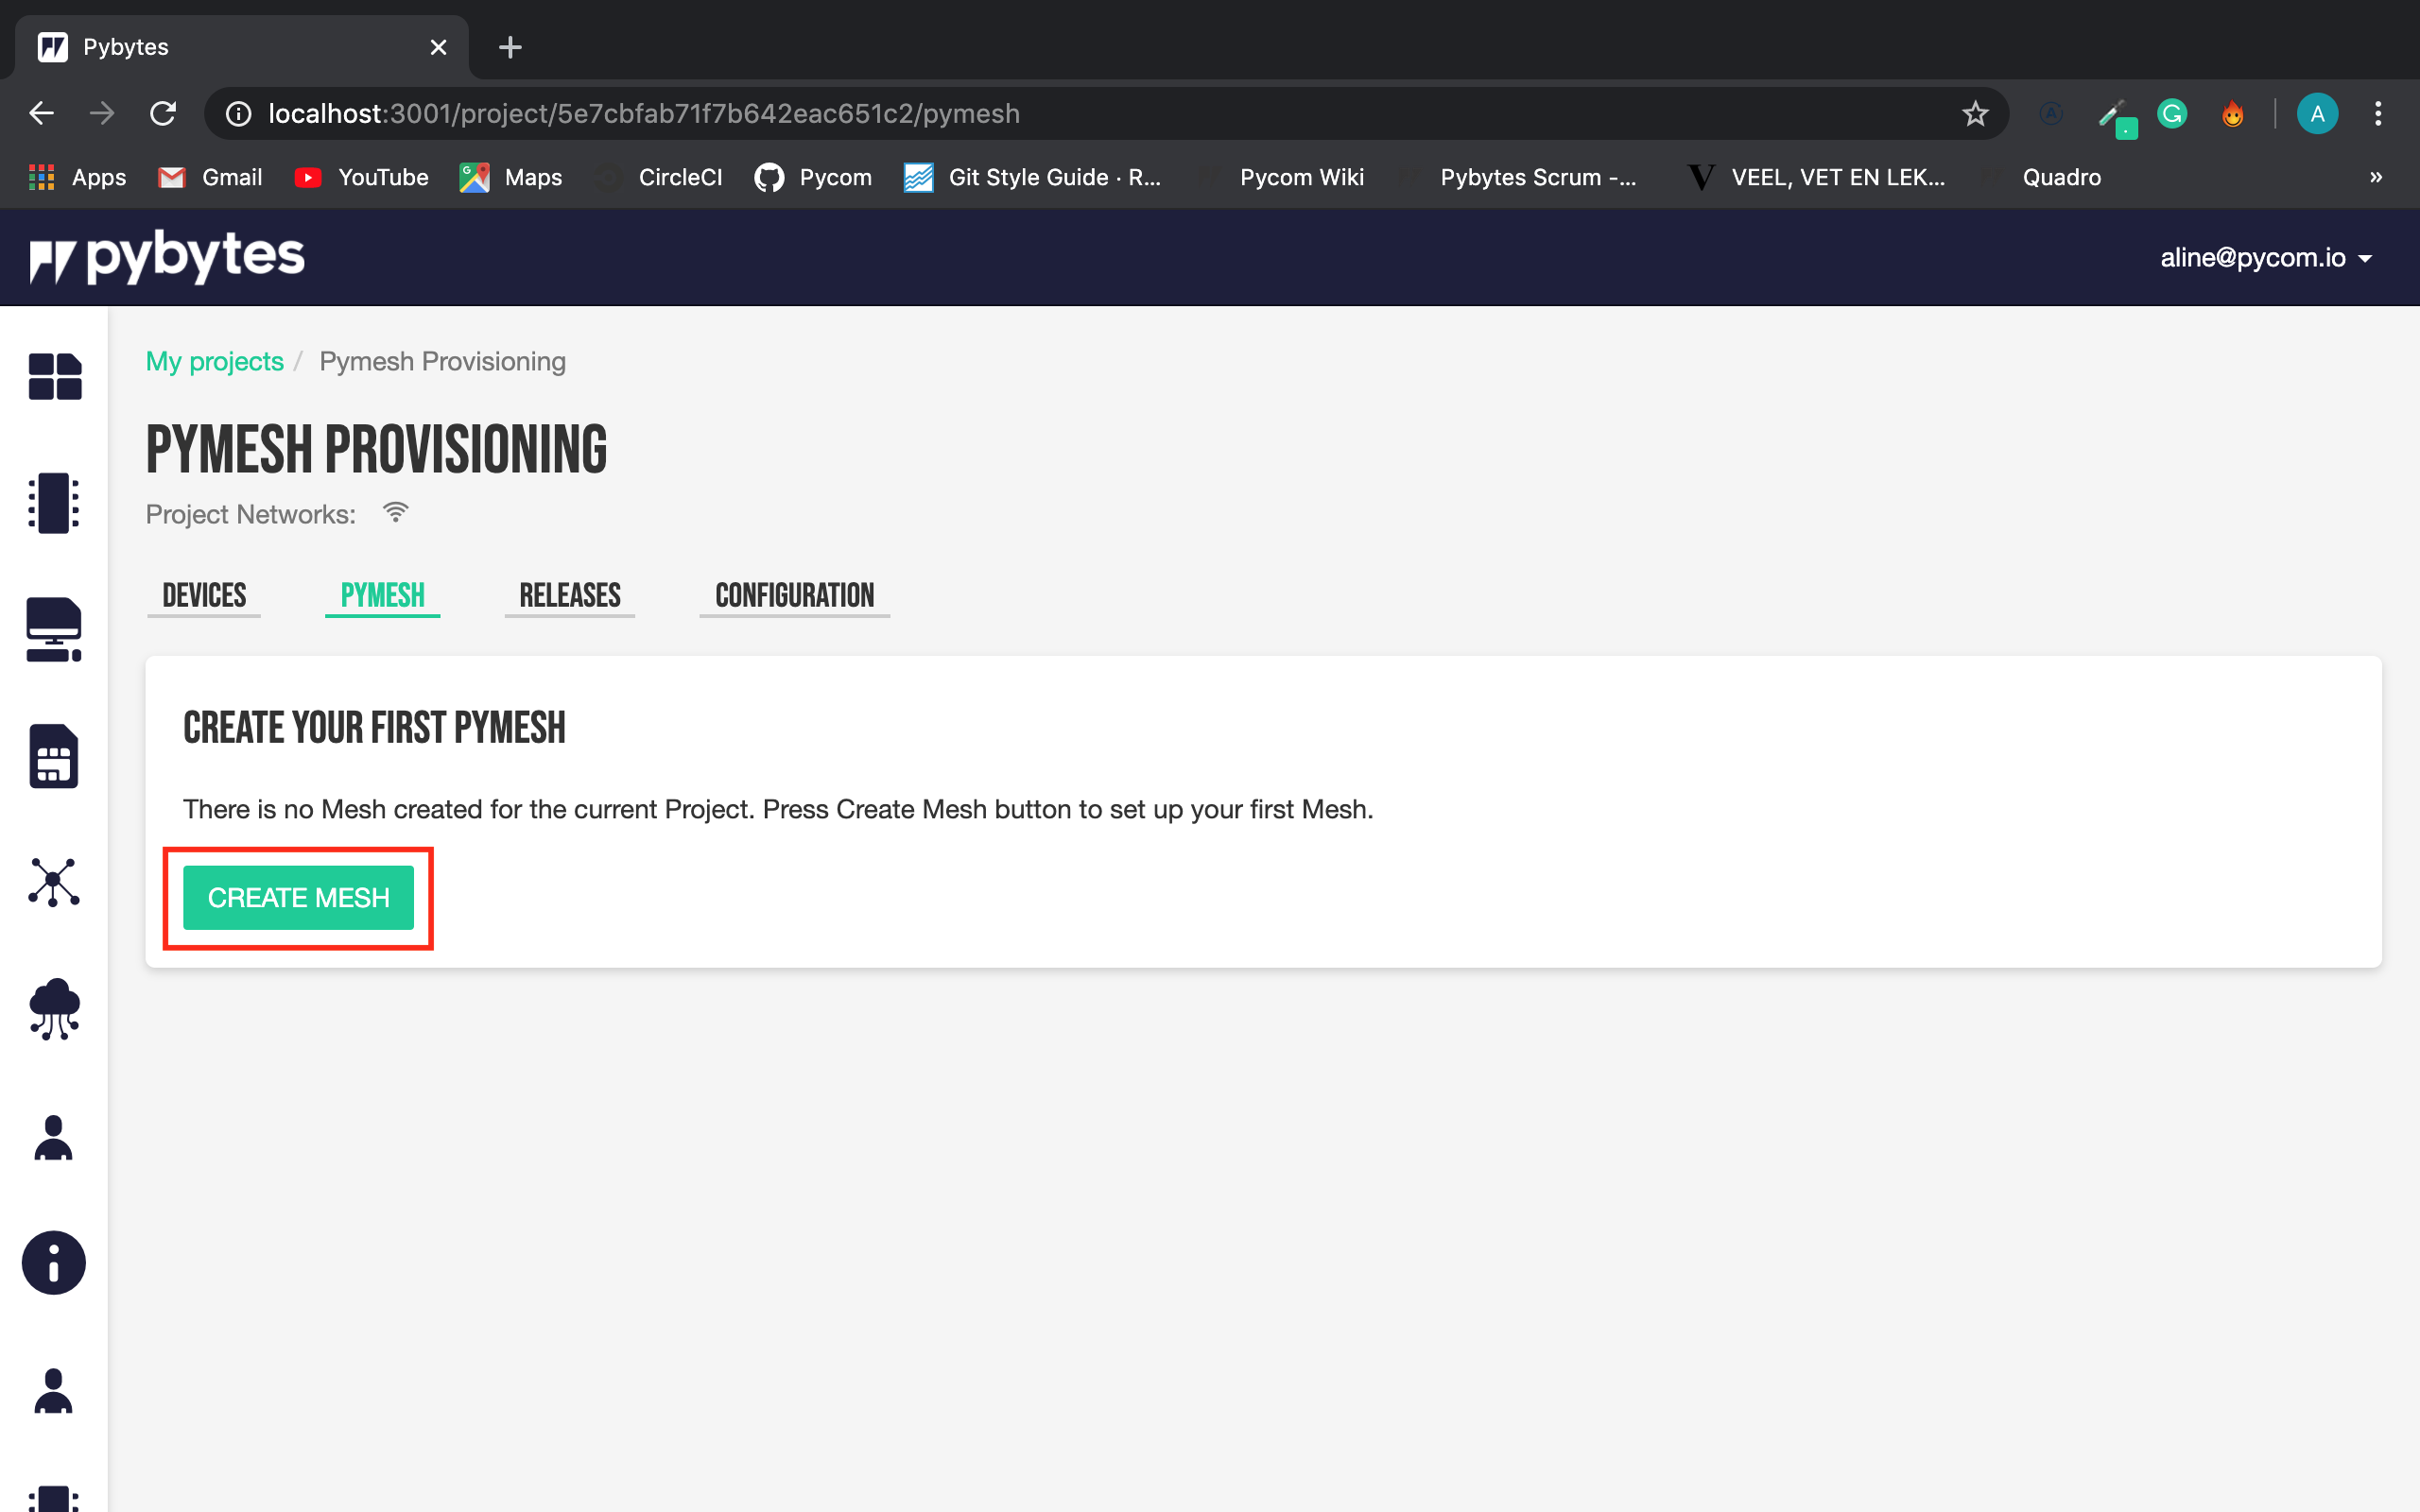
The Pymesh is created under a project, the project interface was extended with the new Pymesh features.
In the screen below there are 2 previously set up projects. Let’s go first with the Pymesh Provisioning were we can see the lopy4, that is running the v1.20 firmware version.

Is possible to create one Pymesh per project.
Once clicking on Create Pymesh button, the user will be guided through a wizard, where will be guided to set up the new Pymesh in 4 steps.
Pymesh Wizard
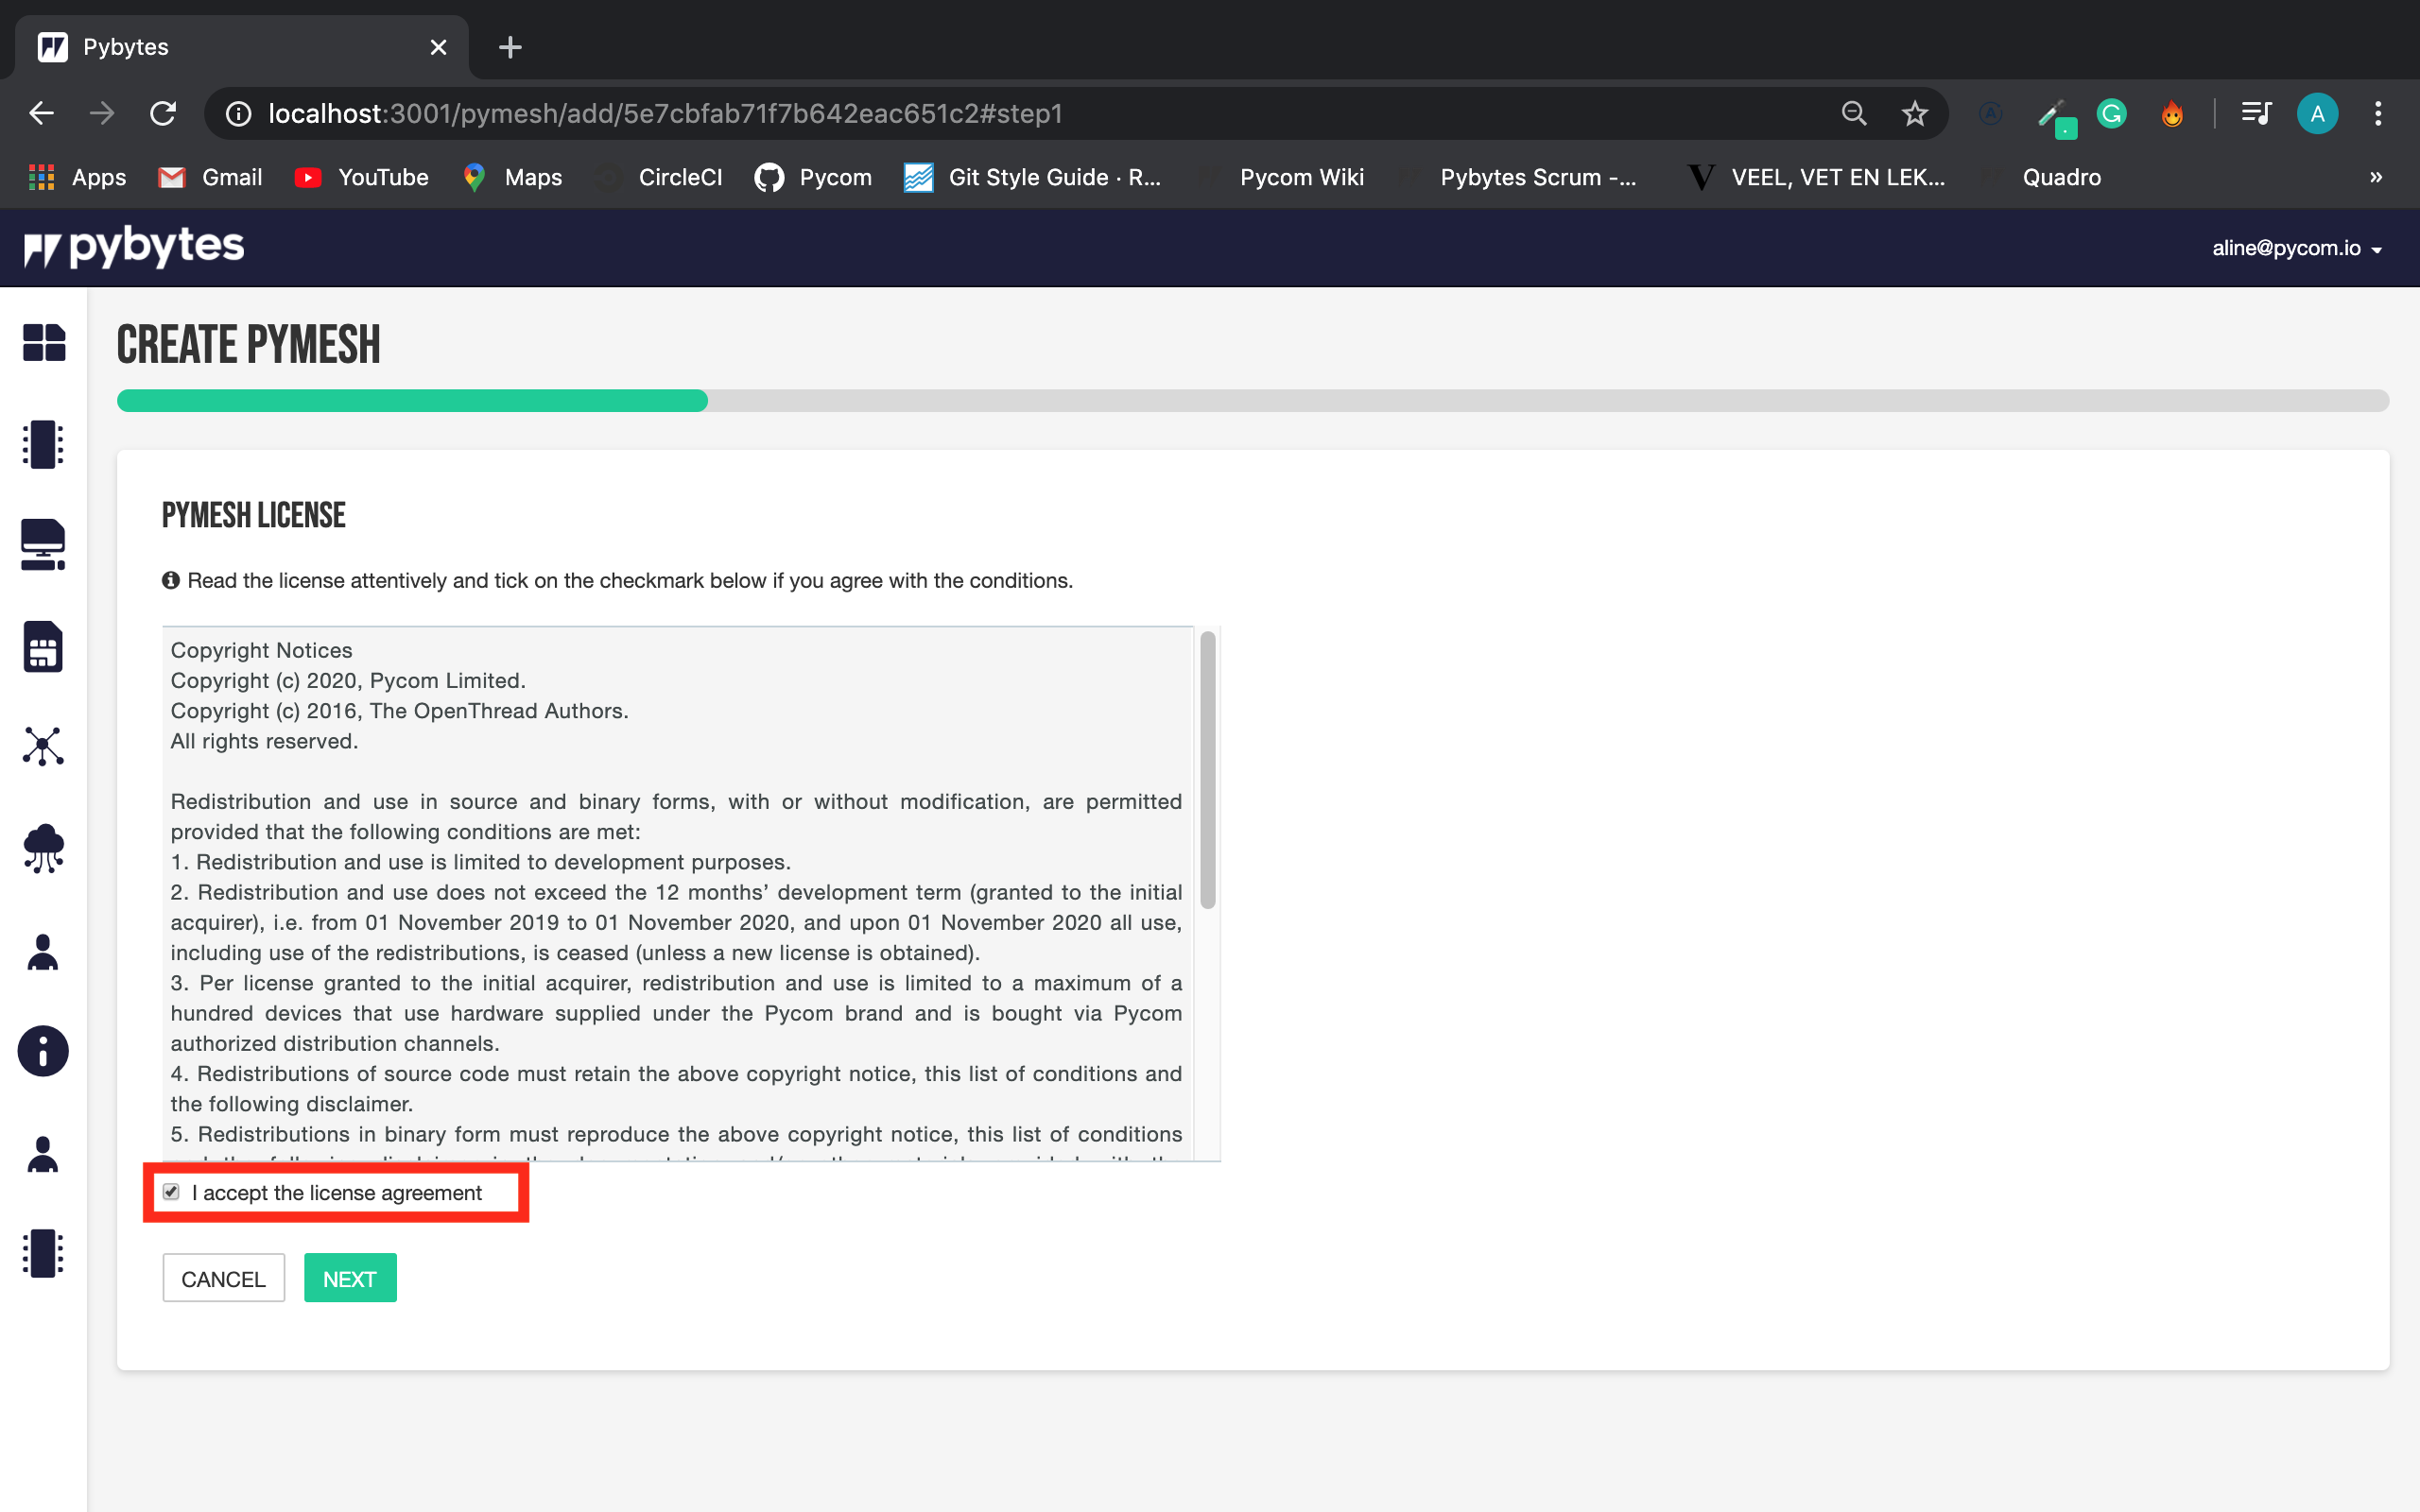
The first step is the license agreement.
After the reading, if the user agrees with the terms, the user should tick the checkmark and click on Next button.
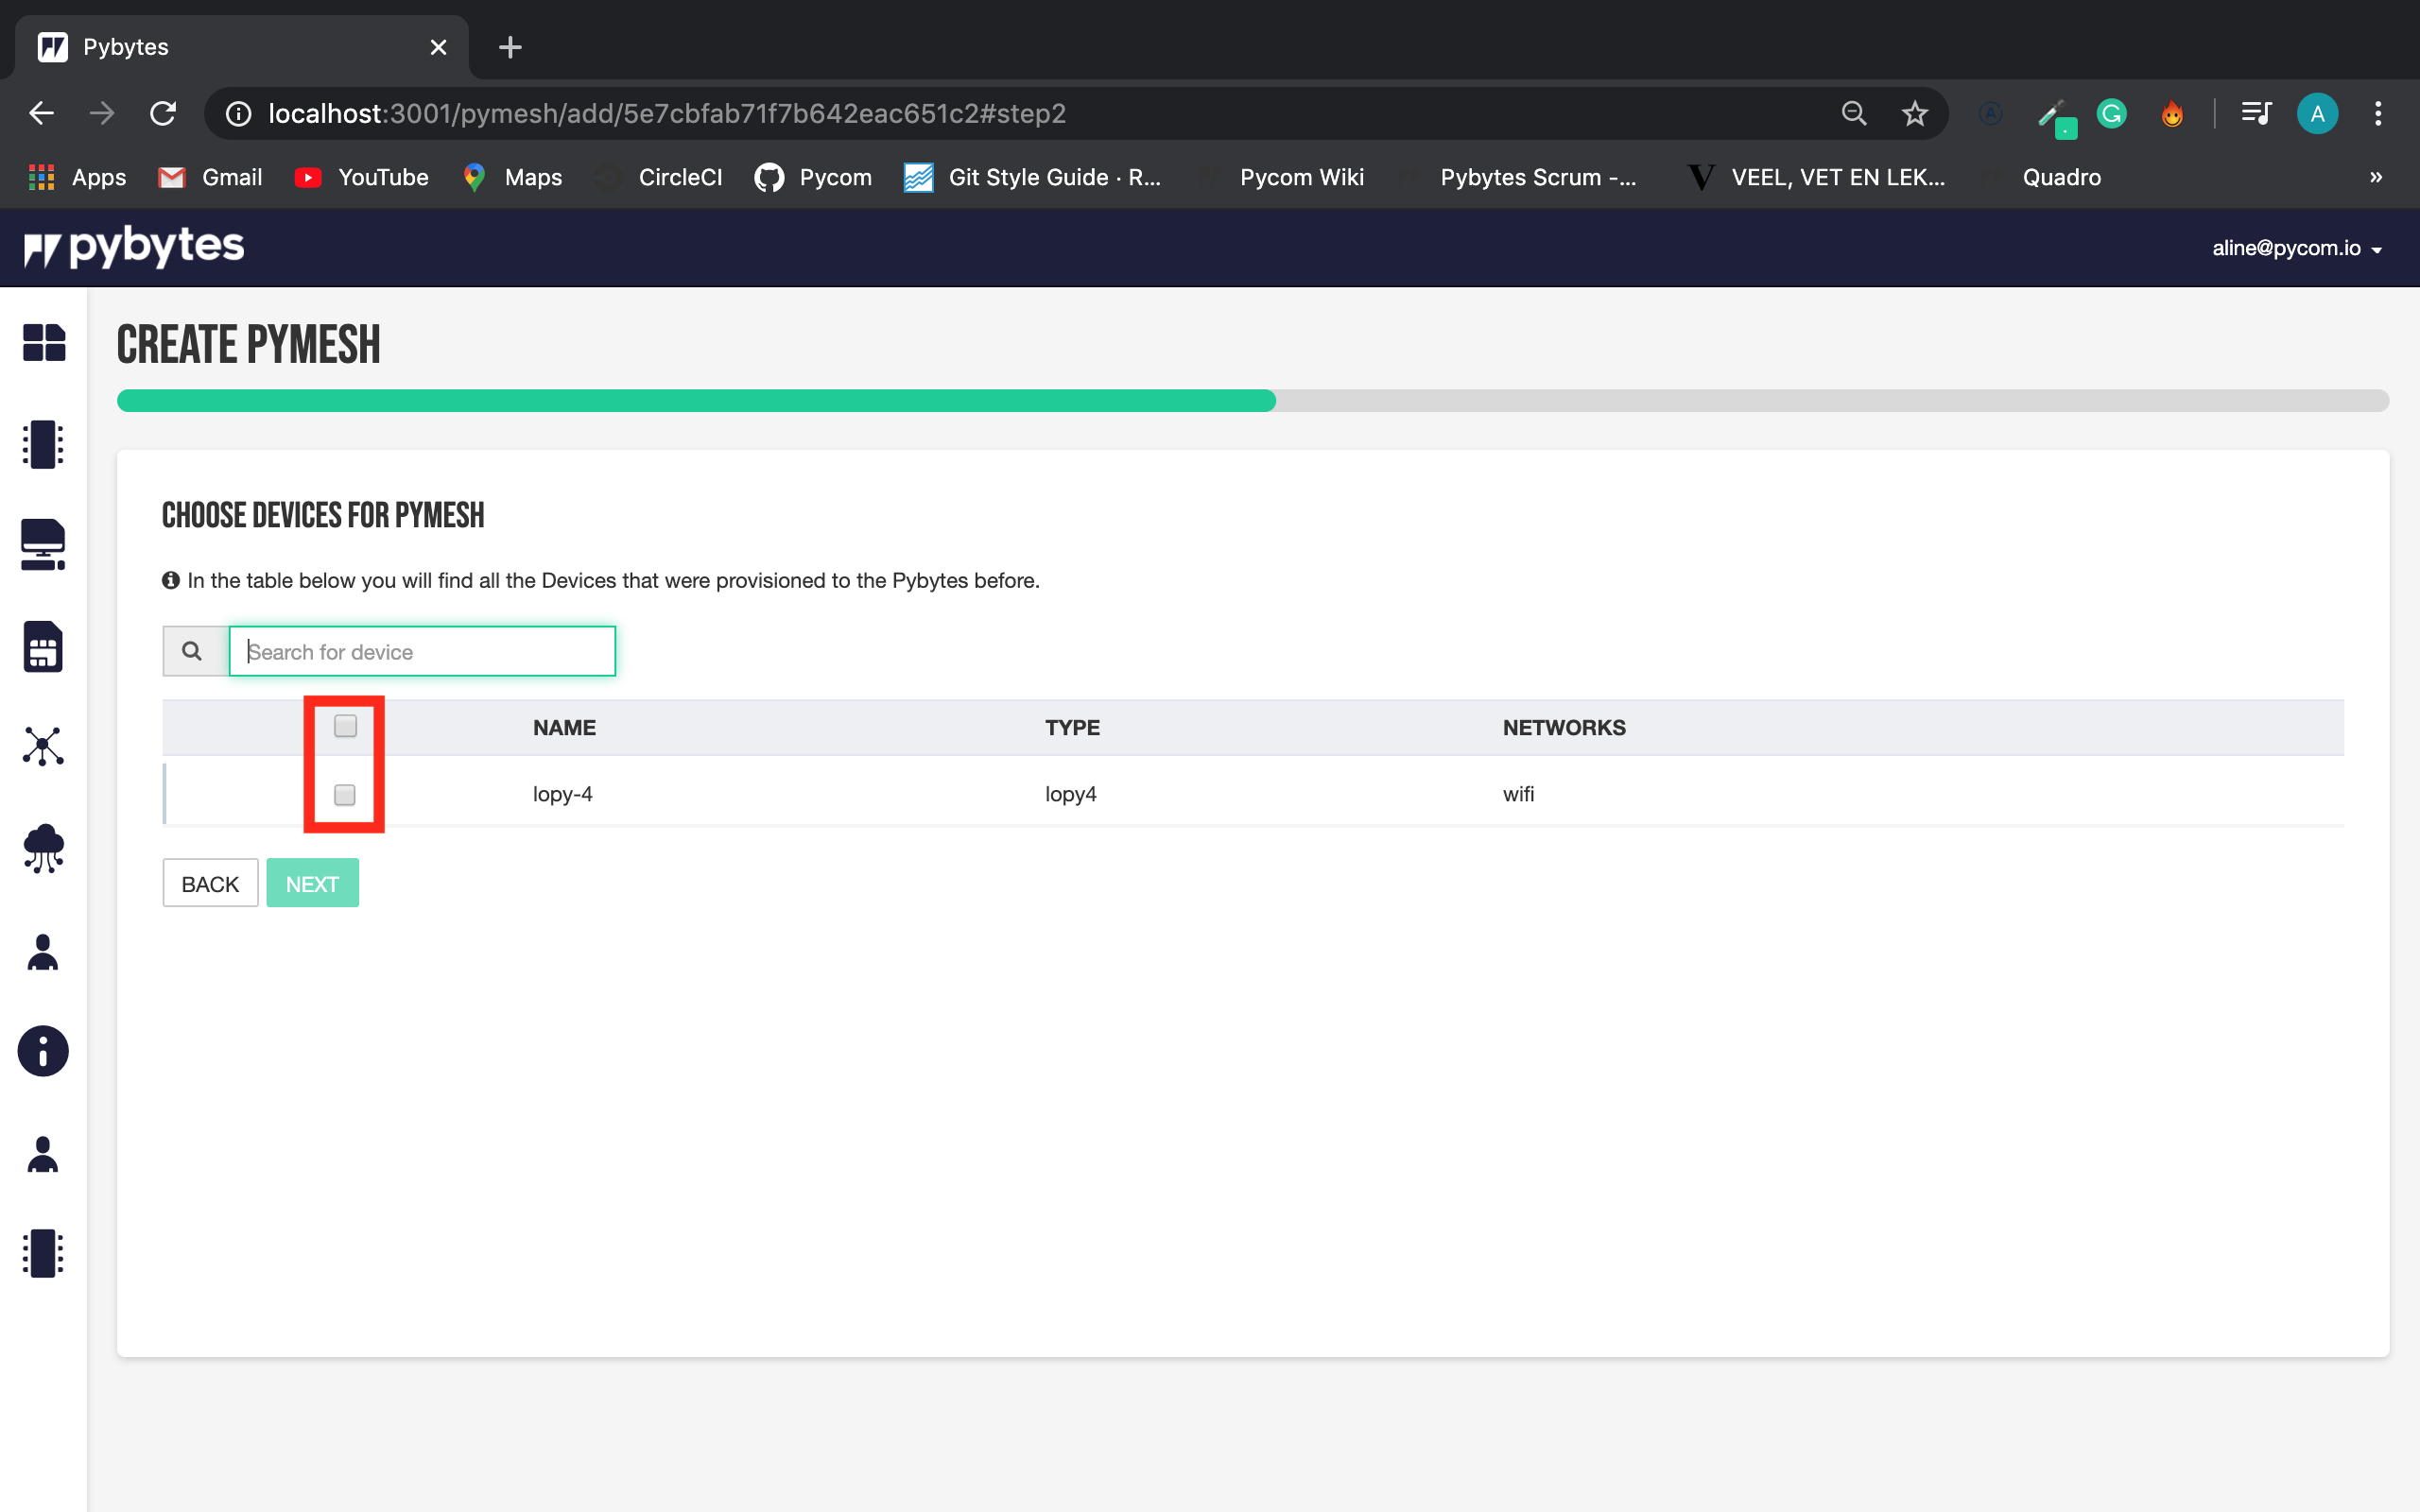
The second step is the device selection.
All devices eligible to be part of a Pymesh, will be under this list. The user should select the devices and click on the Next button.
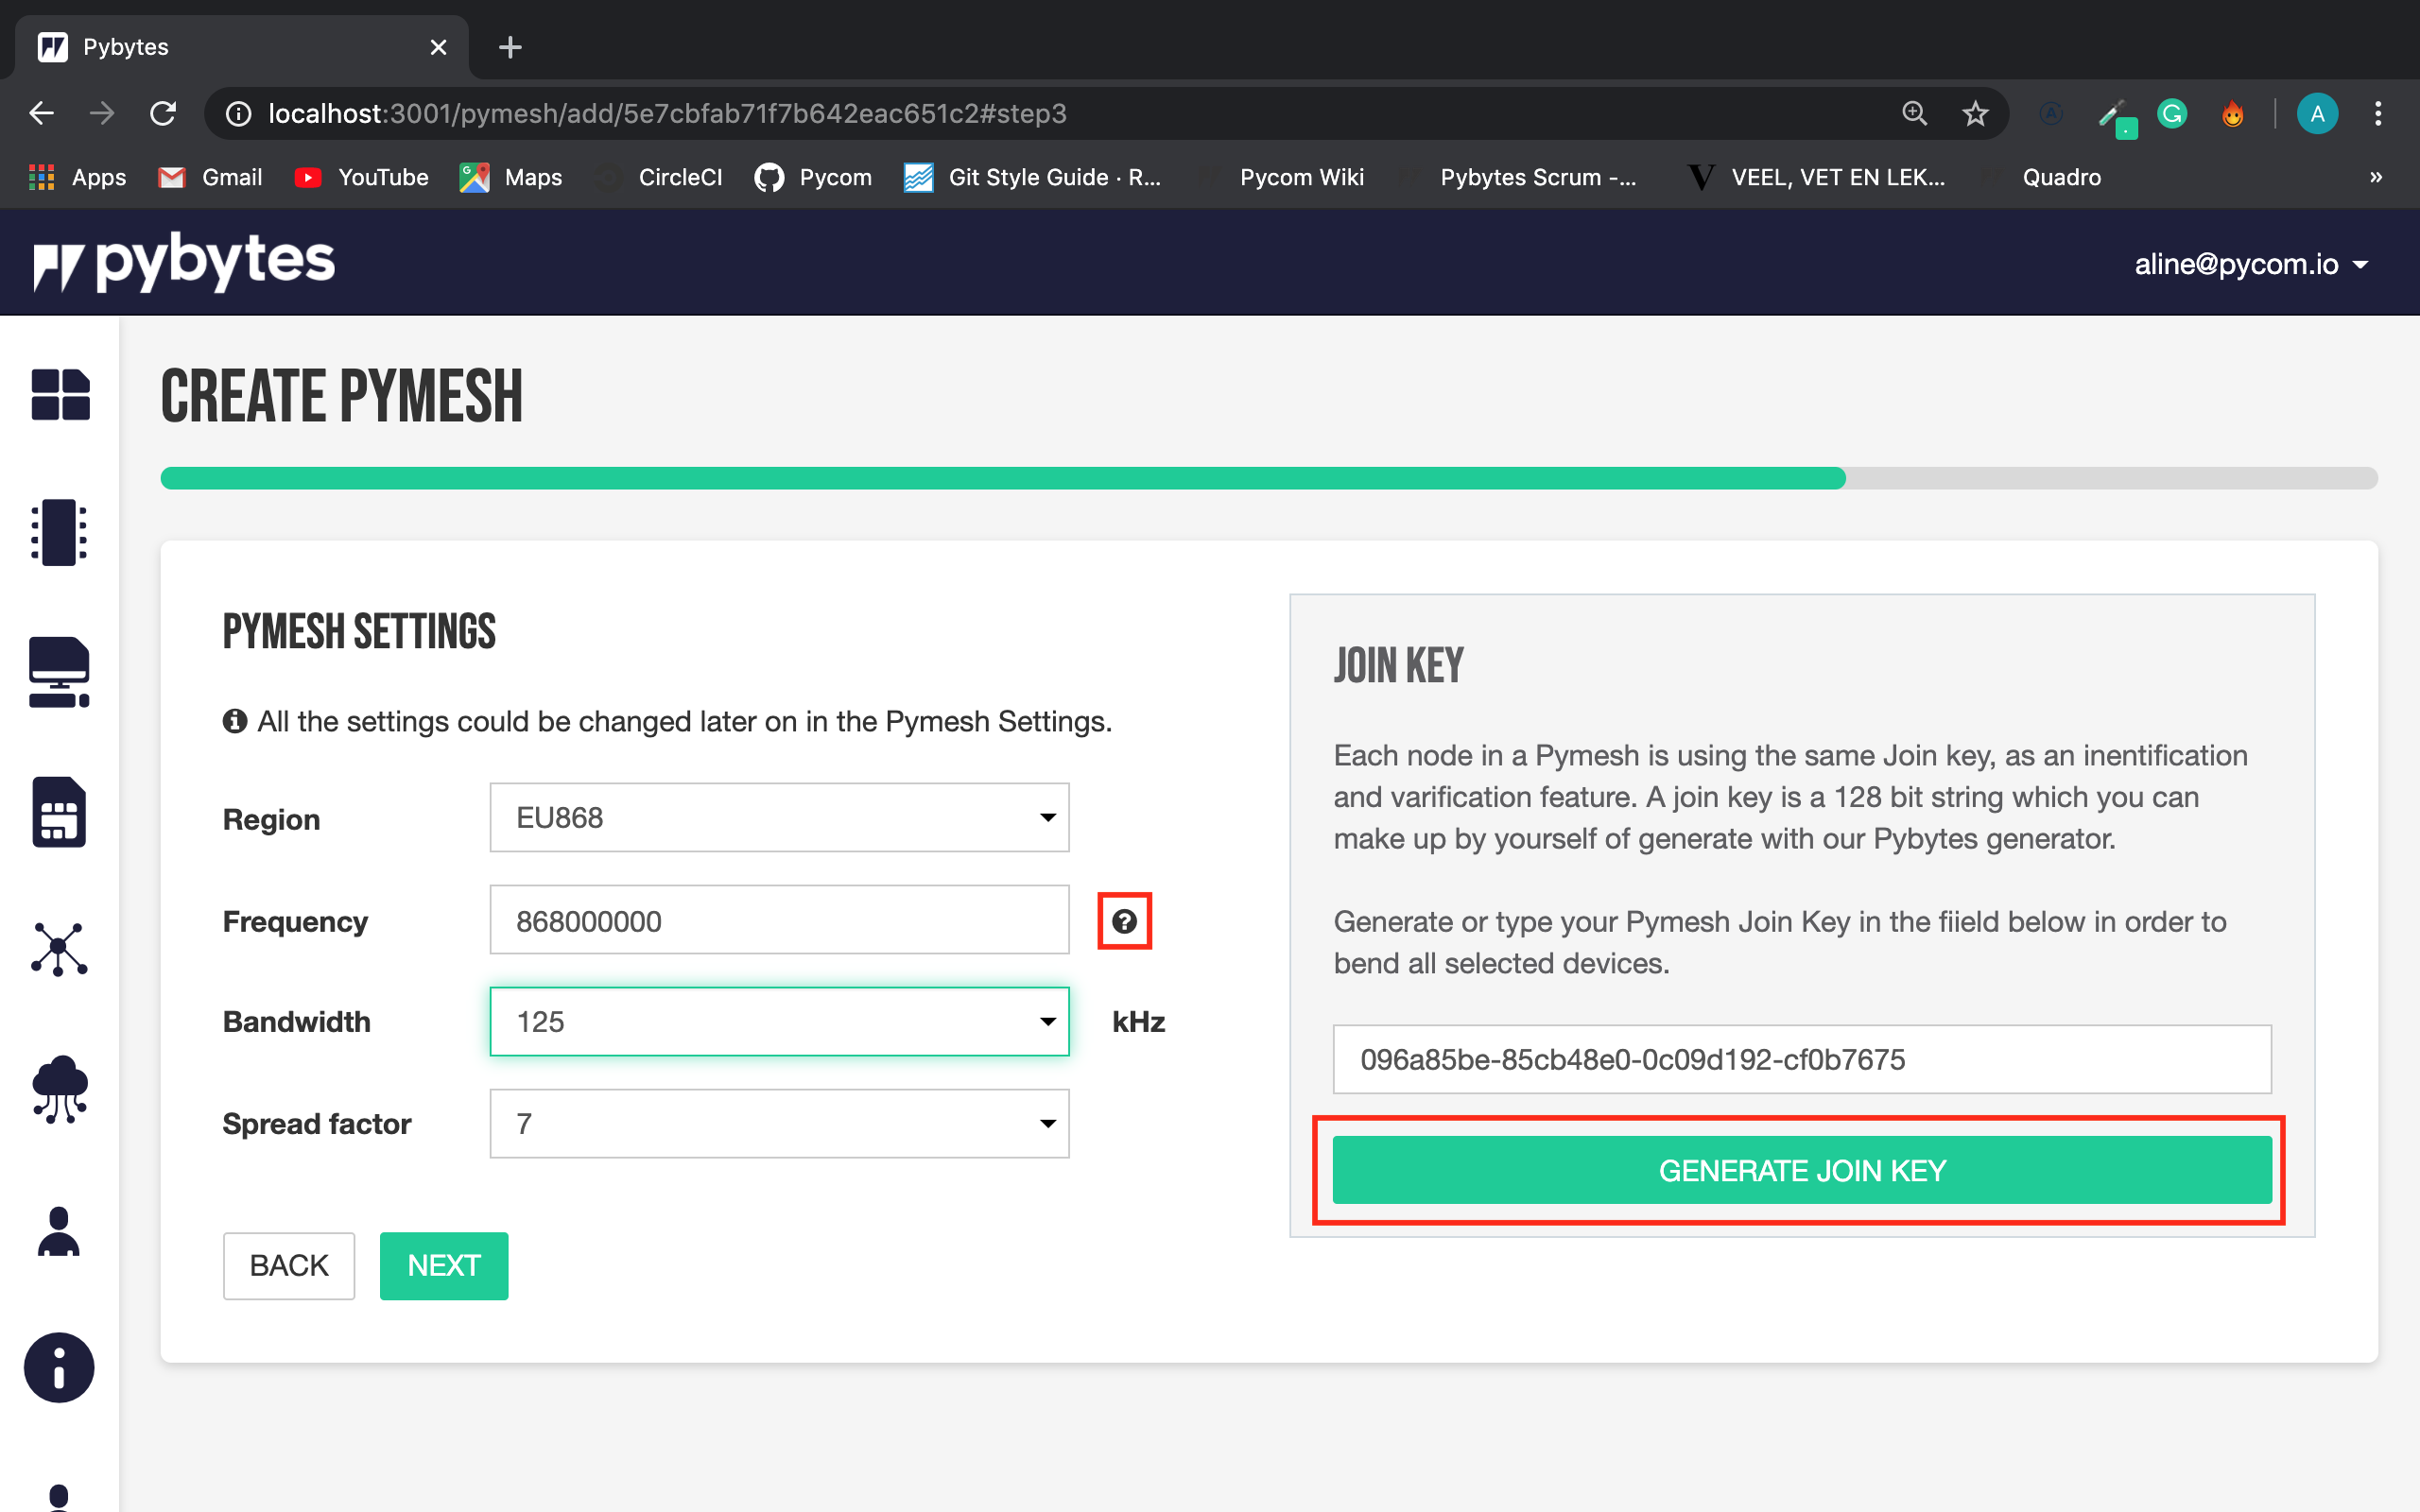
The third step is the Pymesh Settings.
All parameters are filled with default values, if the user needs to change it, it’s possible.
If all the parameters are ok, the user should generate the join-key, and go ahead.
The join-key is what makes the Pymesh unique, In the generate join-key box the user can have more information about the use of the join-key.
If the user wants extra information about each field, hover the mouse over the question mark, and the information will appear.
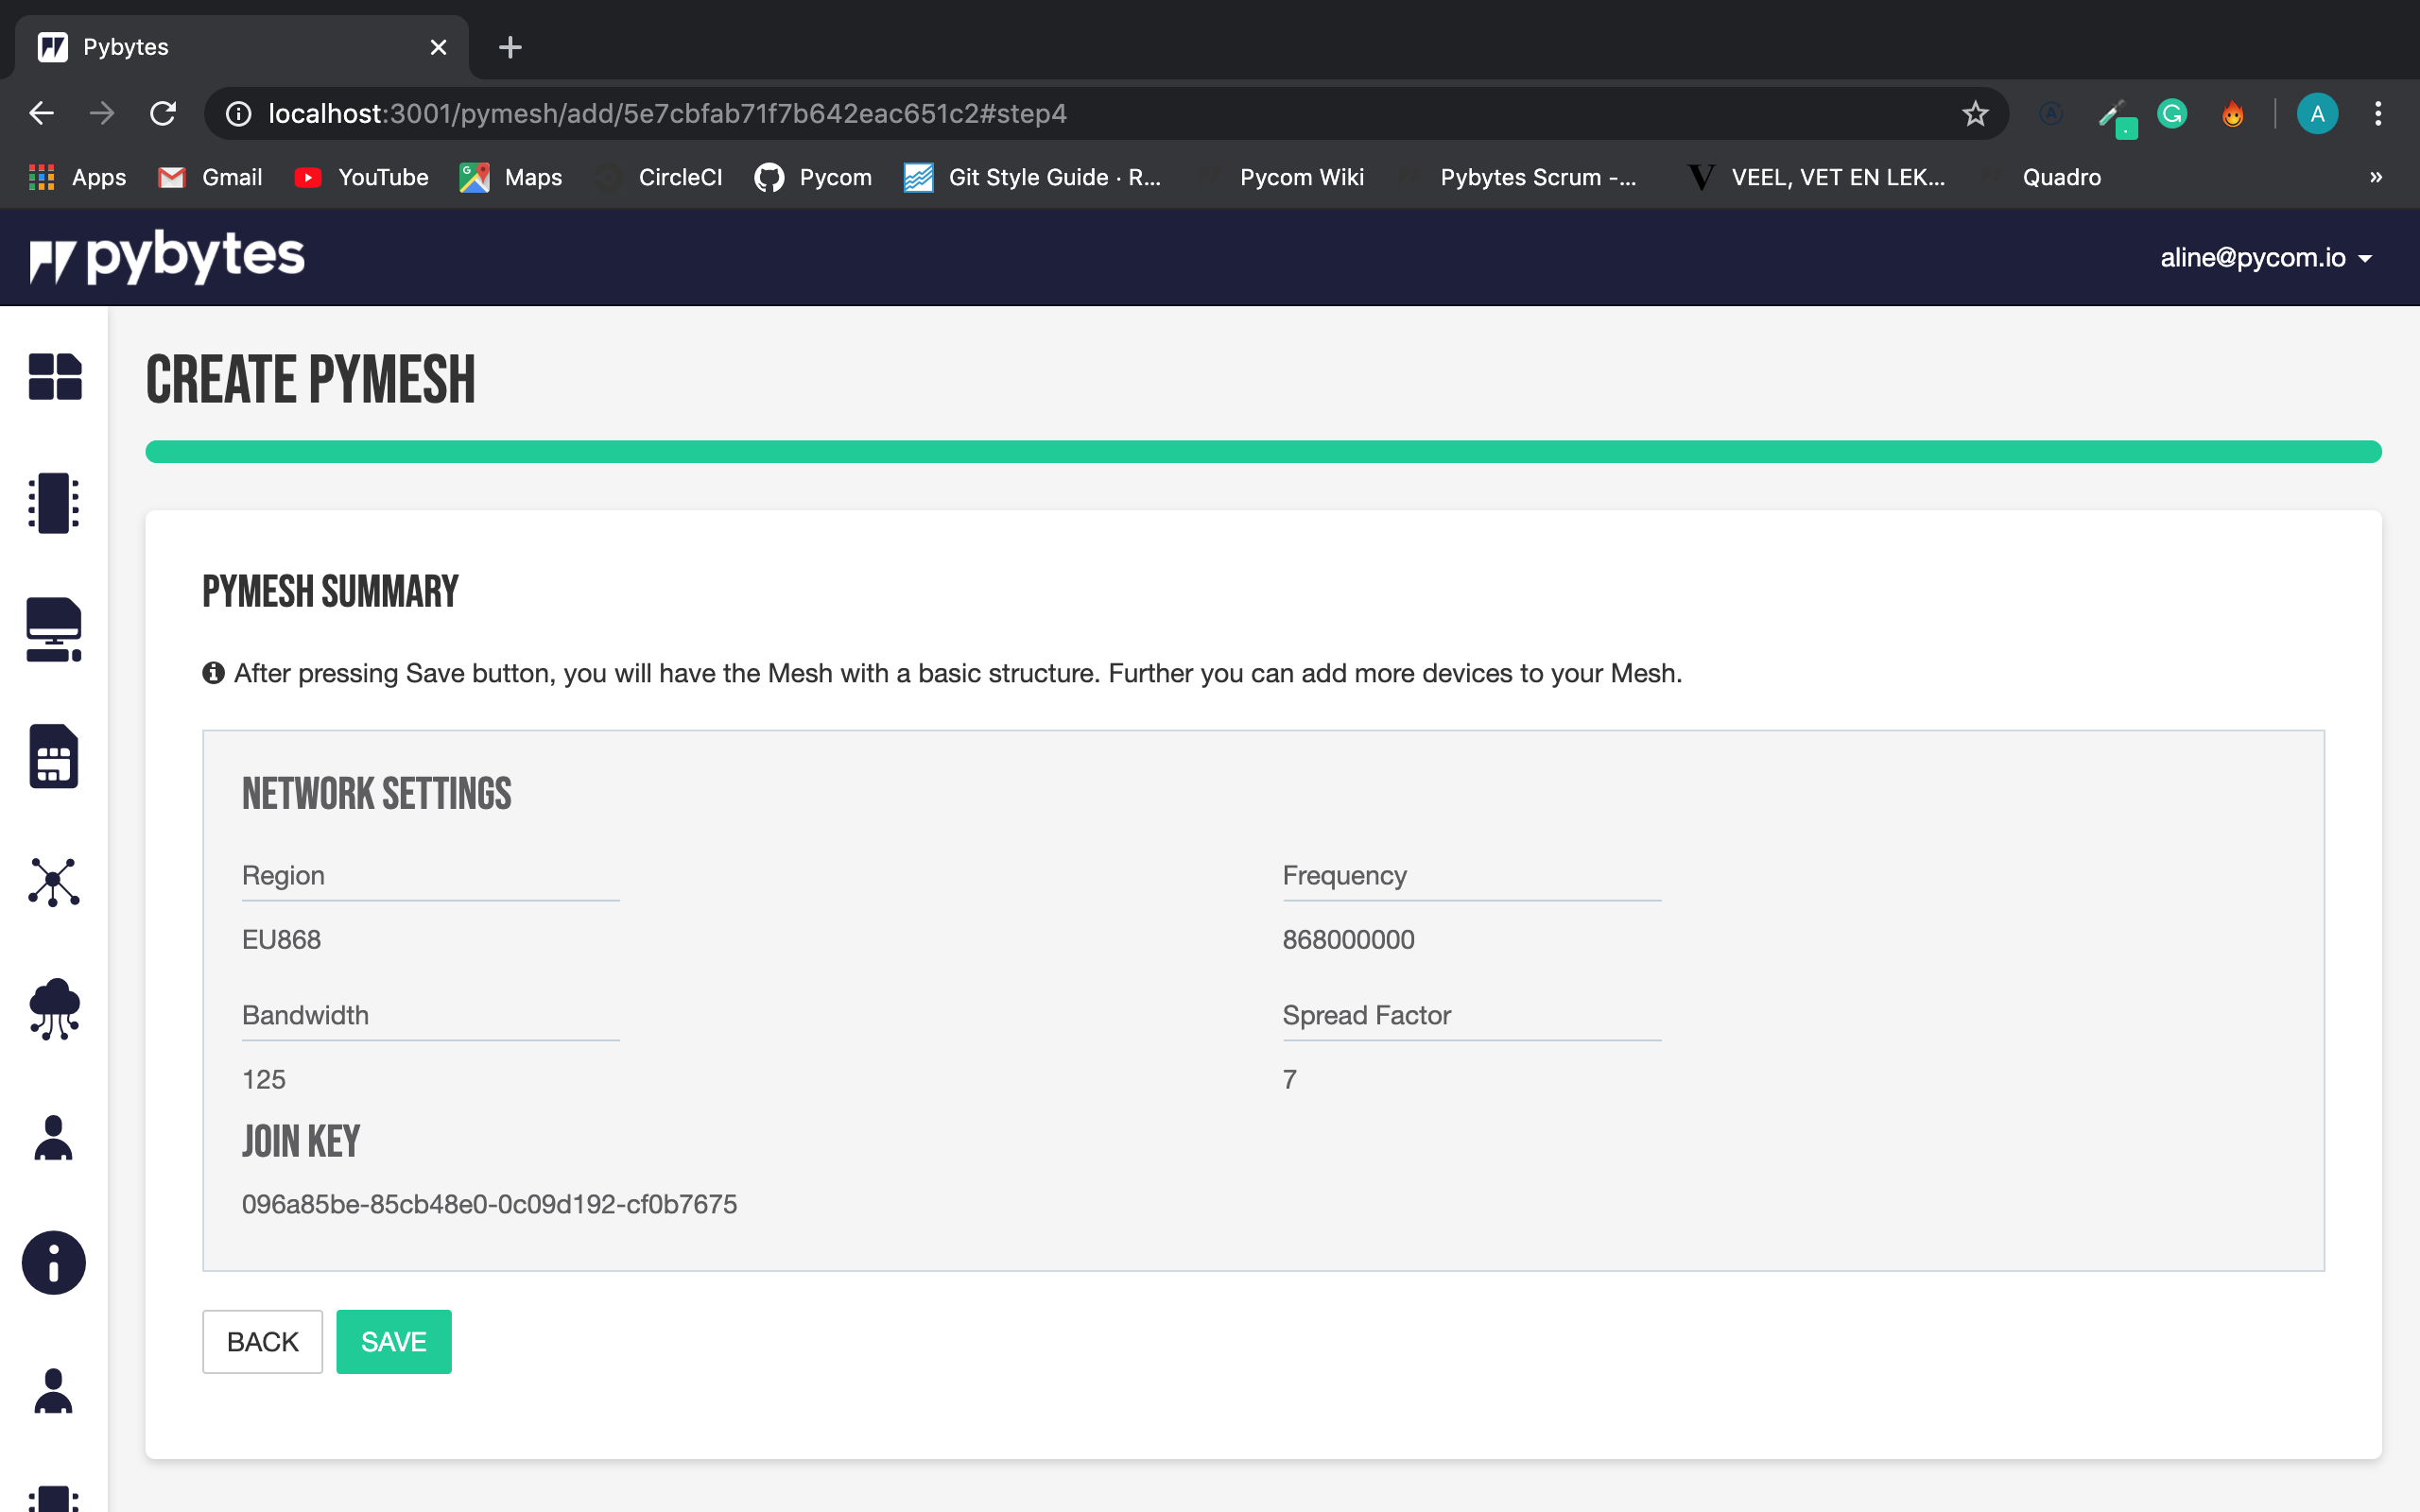
The last step is the Pymesh settings summary.
Here the user can check if all information is correct. If everything is fine, the user can go ahead and save the Pymesh settings.
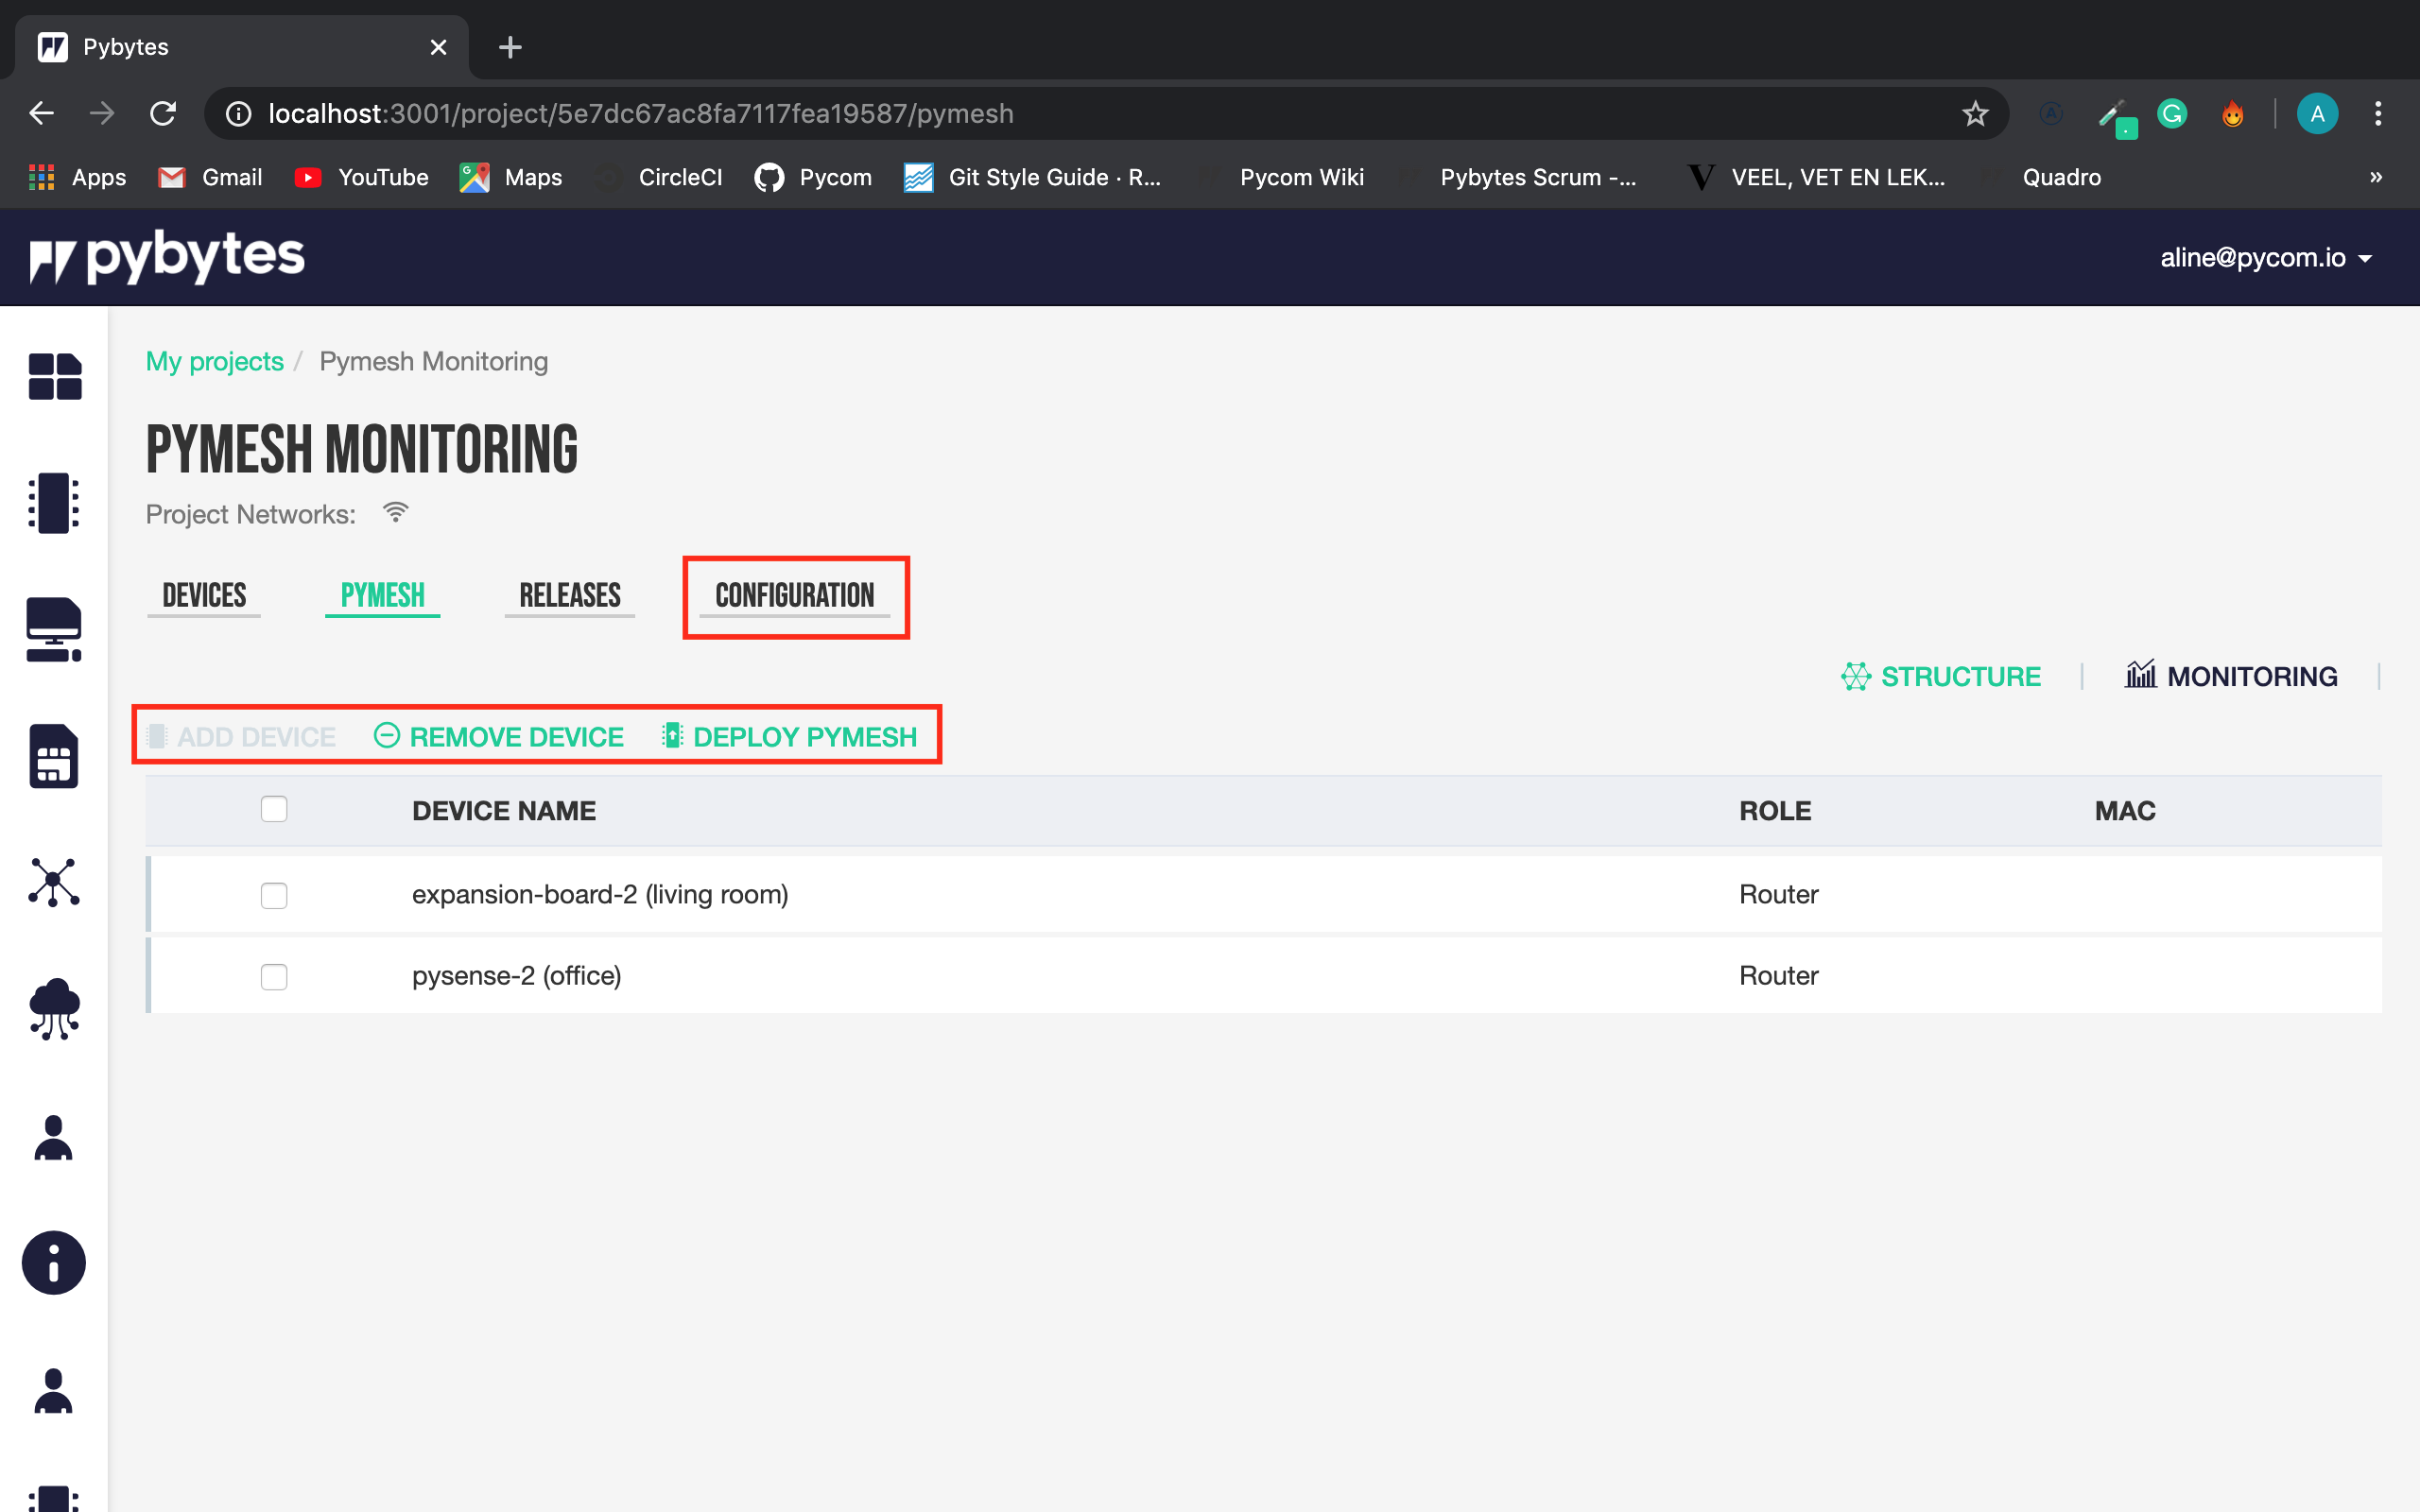
And here is the Pymesh.
On this interface, the user can add or remove devices from the Pymesh. The user can also go to configuration, and change the Pymesh settings if it is necessary.
To deploy the Pymesh Settings and Pymesh Firmware into the devices, click on the Deploy Pymesh button.
Once clicking, the user has a warning message, the update takes up a minute and then there are the confirmation message.
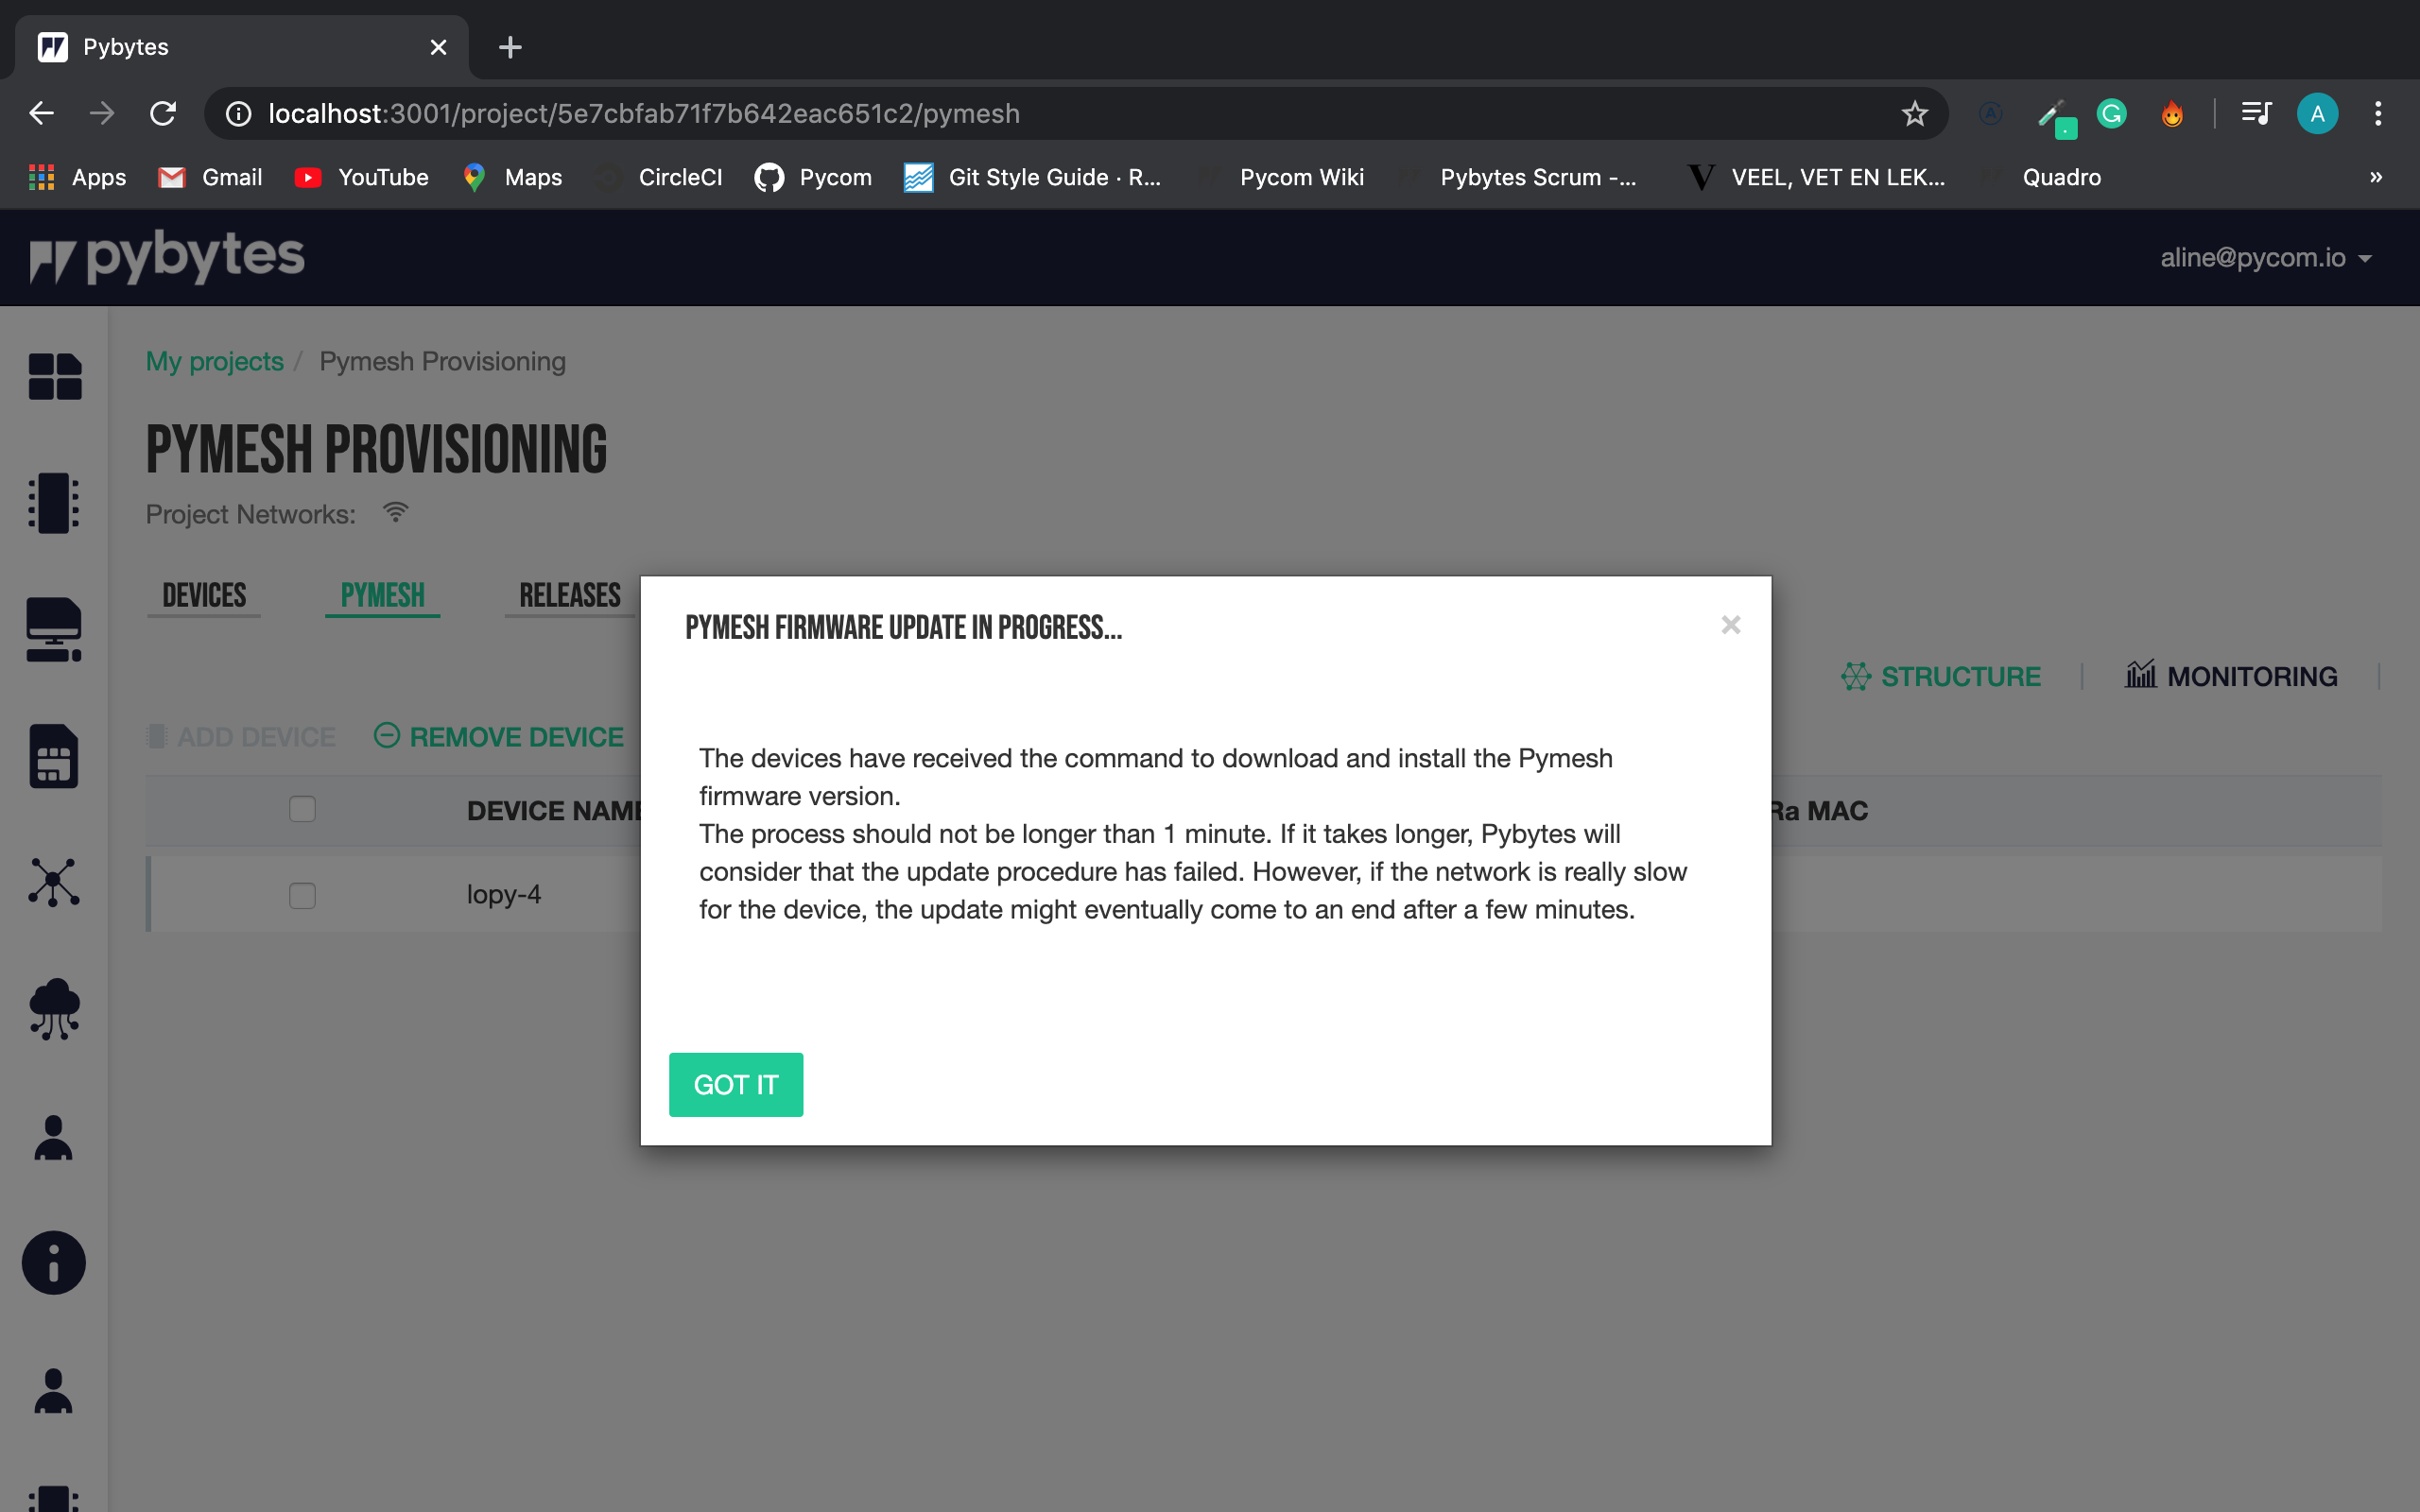
Now the device is properly configured with the Pymesh settings and Pymesh firmware.
All the user needs to do is implement their own script on the well-know main.py file.
To illustrate the Pymesh behavior, check Pymesh Monitoring